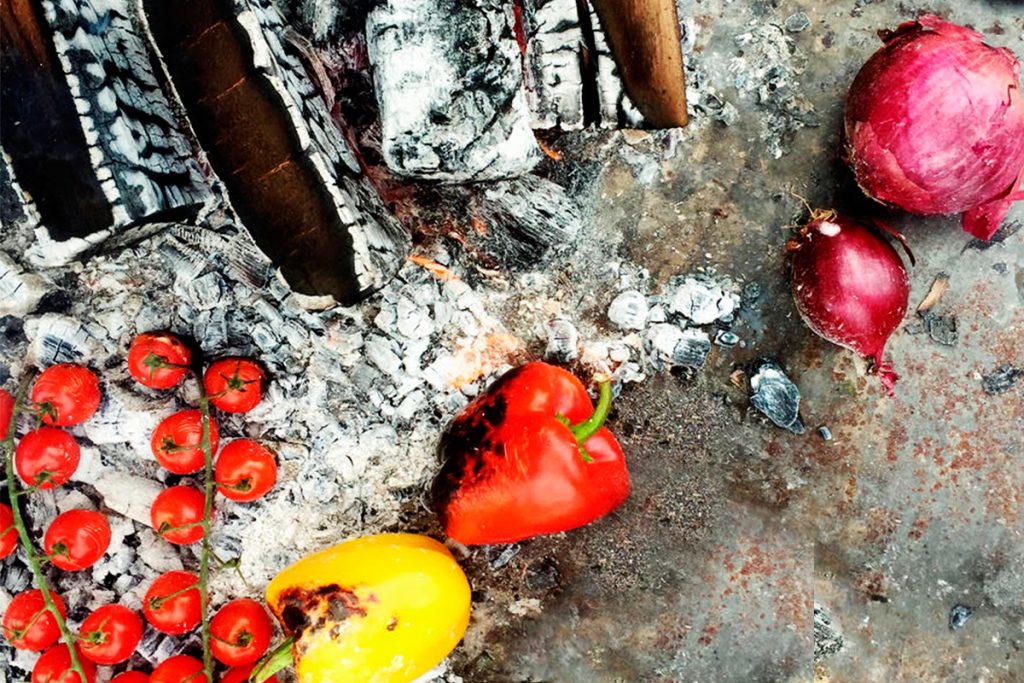
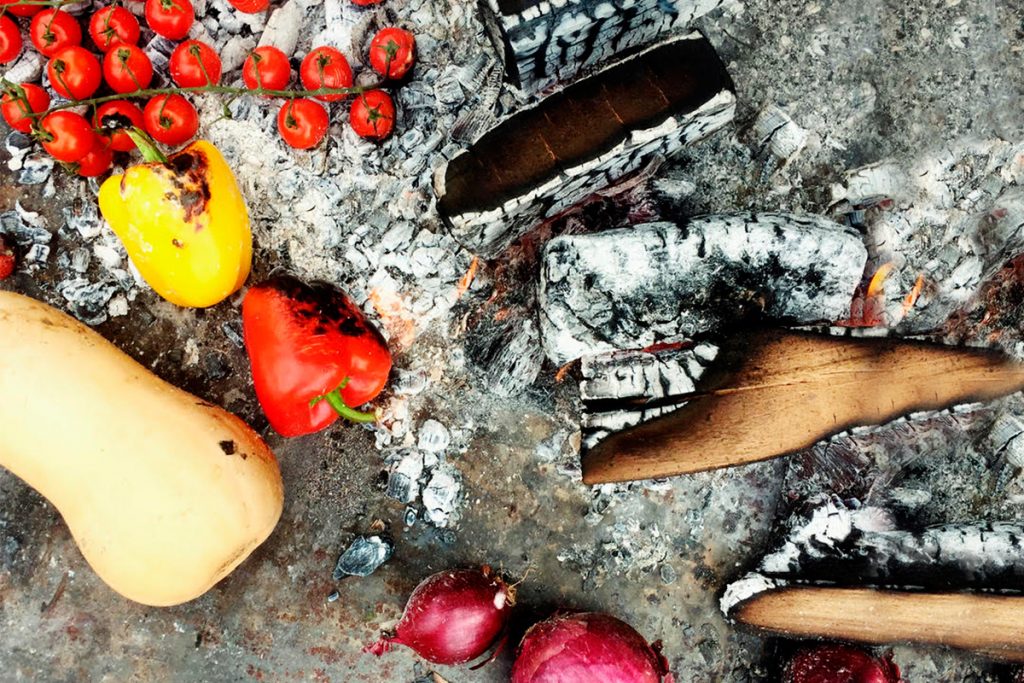
Summer’s had us waiting this year, but now that it finally seems to have arrived I’ve no doubt that a lot of you dusted off your barbecues over this long weekend just gone. You can cook so much more than burgers and bangers over fire, and I’d encourage you to try a recipe like this one from our Woodfired Cookery course next time you light the coals. It’s incredibly easy (if you want to make it even easier then you could always by the flatbreads rather than make them), looks amazing, and tastes delicious. I’d suggest serving with whole grilled aubergine, tahini, and mint yoghurt – maybe grilled baby gem lettuce and mechouia if you’re going all out!
For The Lamb Koftas
400 g good quality lean lamb mince
1 bunch of fresh thyme
1 lemon
Spices (OPTIONAL)
1 teaspoon ground coriander
½ teaspoon ground chilli
1 tablespoon ground cumin
For The Flatbreads
350 g self-raising flour, plus extra for dusting
1 teaspoon baking powder
350 g natural yoghurt
Any spices or seasonings you like
How To Make Flatbreads
Add all the flatbread ingredients to a mixing bowl and mix together with a spoon, then use clean hands to pat and bring everything together.
Dust a clean work surface with flour, then tip out the dough.
Knead for a minute or so to bring it all together (this isn’t a traditional bread recipe, so you don’t need to knead it for long – just enough time to bring everything together).
Put the dough into a floured-dusted bowl and cover with a plate, then leave aside.
Dust a clean work surface and rolling pin with flour, then divide the dough in half, then divide each half into 6 equal-sized pieces (roughly the size of a golf ball).
With your hands, pat and flatten the dough, then use a rolling pin to roll each piece into 12cm rounds, roughly 2mm to 3mm thick.
Place the griddle pan on a high heat or cook directly on your barbecue grill, and once hot, cook each one for 1 to 2 minutes on each side, or until bar-marked and puffed up, turning with tongs.
Brush the flatbreads all over with herby garlic butter or oil as they come off the griddle.
How To Make Lamb Koftas
Place 4 wooden skewers in a tray of water to soak.
Place the lamb and spices into a big bowl, pick in the thyme leaves and finely grate in the lemon zest, then scrunch and mix together well.
Divide the mixture into 4 equal pieces. With damp hands, shape the meat around and along each skewer, pressing little indents into the meat as you go, for a nice texture.
Grill the kebabs on a barbecue for 8 to 10 minutes, or until golden and cooked through.
Serve in flatbreads topped with mint yoghurt and loaded with any other fillings you’d like to add. Then, tuck in!
On July 9th Great British Bake Off 2020 quarter finalist Marc Elliot will be joining us at Philleigh Way for the first of his baking courses. Marc’s an incredible baker with a particular passion for dough, and as well as sharing his knowledge of bread and enriched doughs, he’ll also be teaching attendees how to make everyone’s favourite Portuguese pastries, pastéis de nata.
Marc lives just up the road in Padstow, by way of Leicester and latterly Sheffield where he was previously a fixture of the Peak District climbing scene. A talented climber, he started surfing when he moved to Cornwall, where he has worked as a support worker, a bronze resin sculptor and photographer. In 2016 Marc was involved in a motorcycle accident and was injured so badly that his left leg had to be amputated above the knee. Whilst rehabilitating he discovered baking and a talent turned into a passion that led him to the iconic GBBO tent. Last summer Marc was one of 12 contestants who formed a bubble with the cast and crew of the hit Channel 4 series for seven weeks so that the competition could go ahead despite the pandemic. He made it as far as the quarterfinals, picking up fans and garnering a huge amount of support along the way. Last year’s series was Bake Off’s most popular yet, attracting a peak audience of 10.4 million viewers – partly perhaps because of the explosion in the popularity of baking and the sourdough trend through 2020s lockdowns. I’m really excited that Marc’s going to be leading some special courses as a guest tutor, and can’t wait to welcome him to the cookery school.
Marc, you shot to fame when you reached the quarterfinals of the Great British Bake Off 2020. What was your journey to the famous Bake Off tent? It started four years ago after my accident, because of a need to do something as I was incapable of climbing or surfing, or going out and wandering the moors taking photographs like I was used to doing. I needed something to challenge myself with and stimulate my mind whilst I was still in a wheelchair. One day I thought to myself “I’m going to start baking bread”. It turned out really well and I found that it was really calming and helped the anxiety/depression/PTSD – whatever you’d call what I was experiencing at that time. It grew from there into a hobby and then a passion. My daughter’s always been a big fan of The Great British Bake Off and for the last few years has been saying that I should apply. Last year, just to keep her quiet, I applied and lo-and-behold, I got on!
Considering your creative background [Marc’s also a resin sculptor and photographer] why did you choose baking bread as opposed to another activity such as painting to help your rehabilitation? I suppose it wasn’t really an obvious choice, and wasn’t an area that I thought I’d ever go into, coming from a very active background as a climber and surfer, and channeling my creativity through photography. But, after the accident, my whole world was pretty much ripped apart and turned upside down. Although I didn’t have the physical or even mental capacity to even think about going climbing again, or wandering the moors, I still needed something. I’ve always had a very busy mind and I need to challenge myself and it was just by chance that one day I decided to bake some bread and it lit a spark. It developed slowly at first, it wasn’t an immediate thing, but it grew to be something that I’m very passionate about. Baking’s here to stay!
GBBO covers so many different disciplines within baking. What did you think were your strengths and weaknesses going into the competition? Did any of your bakes surprise you? Certainly my strength was bread. That’s the thing I’ve had most experience in and the area I’m the most comfortable with. My weakness was and probably still is, cake. I can bake cakes but I wouldn’t describe myself as a great cake baker because I don’t really have the patience to finely decorate cakes as many people can. I can bake a cake and it’ll taste good, but going into the competition it soon became apparent in week one with the failure of the David Bowie cake, that cake wasn’t going to be my strong point! I say that cake’s my weak point but on week four when I made the white celebration cake, that really did surprise me because I panicked a bit and changed it right at the last minute. I made that on the day without practicing. It was a completely new idea and it turned out well. Also the ice cream cake, that surprised me as well. The judges really liked that.
Were there any bakes in particular that you were hoping would or wouldn’t come up? Not really, but I suppose the one technical bake that I was the most disappointed with was when we were asked to make éclairs on pastry week. That particular day was incredibly hot – I was on my knees with the pressure and the heat and my mind just went blank. That whole bake was pretty much a disaster – my choux pastry was awful and the crème patisserie was too! I wasn’t particularly worried about that challenge turning up, but I was disappointed with my performance when it did.
What is it that you enjoy so much about working with dough? You’re working with so few ingredients – with sourdough you’re only working with three ingredients! I like using the best ingredients and then it comes down to the importance of being really methodical, being patient, and having good judgement when working with dough and yeasts and cultures and ferments. That part of it fascinates me. I enjoy the science, and making those judgements is something that I find quite therapeutic.
What’s the best tip that you picked up from Prue, Paul, or any of your fellow contestants? Going back to pastry week when I did the éclairs, Prue gave me a really good tip, which I do every time I make choux now. That was to take them out ten minutes before they’re cooked, then pierce the bottoms, turn them upside down and cook them for the final ten minutes. You then leave them in the oven with it turned off and the door slightly ajar. They’ve been coming out amazing – so I think that’s a really great tip. When you pierce the bottom and turn them upside down that lets all the internal steam out so you get a really nice, crisp and dry choux shell.
What advice would you give to any enthusiastic home bakers? For me, it’s about being methodical. Get it all planned out. Read the recipe, get all of your ingredients out and weigh them out, and just be organised. I think that really helps. Also, just follow trusted recipes. Unless you’re designing your own recipe, follow a recipe that you know people have made and had good success with. I’ve found there are a lot of dodgy recipes on the internet! Find a trusted baker and use trusted recipes. I think it’s important to know and expect that you’re going to fail sometimes in baking, that’s par for the course. Try not to get frustrated with that and use it as a period for learning rather than for berating yourself. As a self-taught baker I made a lot of mistakes and still continue to do so, and I have to remind myself to use that as an opportunity – which is easier said than done, sometimes! Finally, enjoy the process. Often I think that one bakes wanting to get to the end and see the final result, but I think that enjoying the process from the start to the end is a really important piece of advice also.
What skills and recipes are you looking forward to sharing on your courses at Philleigh Way? I’m looking forward to sharing my brioche croissant and pastéis de nata recipes. They’re really good recipes. The pastéis de nata are such amazing little tarts but they’re quite involved to make and I’m looking forward to sharing those skills and seeing what people can make with those.
Cornwall’s a county with its fair share of signature baked goods. As an adopted Cornishman, what’s your favourite and why? I think it has to be the pasty. Cornwall’s got lots of good bakes, from saffron buns to clotted cream cakes and things like that, which are all nice, but I think that for me, it’s hard to beat a really good Cornish pasty.
Marc’s Baking Courses will be taking place on Friday the 9th of July and Saturday the 18th of September. To join him for the day, click here:
Romanesco is a tomato-based sauce that originated from Valls, Tarragona, Catalonia. The fishermen in this area made this sauce to be eaten with fish. It is typically made from any mixture of roasted peppers and tomatoes and garlic, toasted almonds, pine nuts, and/or hazelnuts, olive.
It goes with anything, but if you want to up your fish intake then hit up some great local suppliers and give romanesco sauce a go! I like to serve it as pictured, with pan fried hake and tapenade, finished with a sprinkling of parsley.
INGREDIENTS
100g almonds
200g roasted red peppers from a jar, drained (or BBQ/grill them)
1 garlic clove
1 tbsp sherry vinegar , plus extra to season (optional)
1 tsp smoked paprika
50ml olive oil
METHOD
Toast the almonds in a dry frying pan for 3-4 mins until starting to turn golden and smelling toasted. Shake the pan often to turn them. Tip out and leave to cool.
Drain the red peppers and tip into a food processor with the almonds, garlic, vinegar and smoked paprika, then blitz to a chunky paste.
With the motor still on, slowly drizzle in the olive oil to make a dip. A bit of texture works well for this rather than blending to a super smooth consistency. Season well, adding a little more vinegar, if you like.
We’re excited to be bringing the Philleigh Way Food Trailer to The Food Barn at Tregew, just outside Flushing, Falmouth. The Food Barn is a weekly produce and farmers market where you can enjoy some of the best local and sustainable produce, and also a great brunch or lunch from us.
Here’s what we’ll be dishing up on the day:
Brunch
Montadito (Spanish tapa-style roll) £6
~0~
Shakshuka with focaccia (v) £7
Lunch
Smoked jerk chicken, pineapple salsa, black eye peas and coriander flatbread. £9
The short season for English asparagus is now underway, and because this incredible produce is only available for six weeks or so I’d encourage you to eat as much of it as you can whilst you have the chance!
This recipe makes a great light lunch and if you don’t have a lidded barbecue or don’t want to light a fire to cook over then you can also cook it in your kitchen under the grill. The main thing is that you cook it in a sealed or covered environment (such as a smoker or lidded barbecue) so that the steam and smoke can cook and flavour the asparagus and mozzarella.
With a long weekend coming up, it’s definitely time to dust off your barbecue if you haven’t already. Pick up a bunch of new season English asparagus and some good mozzarella, and treat yourself.
INGREDIENTS
Bunch of English asparagus
2 balls of mozzarella
Good quality EV olive oil or rapeseed oil
Pomegranate molasses
Red wine vinegar or juice of one lemon
Pinch dried chilli flakes
METHOD
Light your barbecue and allow the fire to burn down until you have a bed of hot coals.
Snap the woody ends off the asparagus spears (hold the bottom end and mid point and bend, and the spear will snap at the right place). Keep two back and place the rest of them on the grill.
Cook until beginning to char, then turn the asparagus spears over. Bunch them together on the grill and place the two balls of mozzarella on top of the asparagus, then place the lid on your barbecue (or cover with foil if you don’t have a lid). The idea is that the moisture steams the asparagus and mozzarella and it takes on a bit of the smokey flavour.
Use a speed peeler to peel the two reserved raw asparagus spears lengthways into strips.
Check after three minutes, and once the asparagus has charred on the other side and the mozzarella is starting to melt, use a spatula to remove it to a serving dish.
Place the peeled asparagus strips on top of the mozzarella.
Dress with a good slug each of olive or rapeseed oil, pomegranate molasses and red wine vinegar or lemon juice. If you like an element of heat then sprinkle over a pinch of dried chilli flakes.
You can serve this as it is, or with charred ice gem lettuce or on a piece of toasted focaccia. If you want to take yourself to dairy heaven then you could even spread cream cheese on the toasted focaccia before piling it high with your baked and burnt asparagus and mozzarella.
Really grateful to be featured in the current edition of Food and Travel Magazine alongside St Mawes Hotel as their Book & Cook recommendation.
Now, more than ever, we need our fix of fabulous food and inspirational destinations. So, our friends at Food and Travel magazine are kindly offering 20% off the price of an annual UK print subscription, as a gift to Philleigh Way Cookery School customers, bringing the price down to just £39.60 (usual price £49.50).
With uplifting gourmet destination ideas and globe-trotting recipes galore, it’s the perfect antidote in these challenging times for home cooks and seasoned chefs alike. Intrigued? Take a peek at an issue here
To get your discount, click on this link – https://foodandtravel.com/subscribe – and use the promotional code 2400 when prompted (offer ends 18 June 2021).
It’s the season for ramsons, better known as wild garlic because of the pungent smell that fills old woodlands at this time of year. Early in the season, through March and into April, is the best time to pick a few of the young leaves where and when you come across a large carpet of them under the trees. Most people use wild garlic leaves to make pesto, but it can and should be so much more than that. Now that we’re a few weeks in to their season, if you’ve had your fill of wild garlic pesto and want to try something else then here’s a great recipe that combines them with wonderful Cornish sole.
About Cornish Sole
Cornish sole is the new name being used for megrim sole, a flat fish that is remarkably good value and incredibly popular on the continent – so much so that until Brexit regulations put a stop to most exports, 95% of the megrim sole landed in Cornwall was shipped to mainland Europe. It’s now being renamed Cornish sole in the hope that a new name will tempt more domestic consumers to try it. Cornish sole caught by demersal trawl is deemed more sustainable by the Cornish Good Seafood Guide so try to get that if you can, then pick a handful of wild garlic leaves on your next walk and give this recipe a go!
Cornish Sole and Wild Garlic Saag Aloo
INGREDIENTS
Cornish sole (the fish formerly known as megrim sole) fillets (2 per person)
1 onion, finely chopped
2 garlic cloves, sliced
1 tbsp chopped ginger
500g potato, cut into 2cm (¾in) chunks
1 large red chilli, halved, deseeded and finely sliced
½ tsp each black mustard seeds, cumin seeds, turmeric
Large handful wild garlic leaves
METHOD
Heat 2 tbsp sunflower oil in a large pan, add 1 finely chopped onion, 2 sliced garlic cloves and 1 tbsp chopped ginger, and fry for about 3 mins
Stir in 500g potatoes, cut into 2cm chunks, 1 halved, deseeded and finely sliced red chilli, ½ tsp black mustard seeds, ½ tsp cumin seeds, ½ tsp turmeric and ½ tsp salt and continue cooking and stirring for 5 mins more.
Add a splash of water, cover, and cook for 8-10 mins
Check the potatoes are ready by spearing with the point of a knife, and if they are, add wild garlic leaves and let it wilt into the pan.
Finally lay the fish over the top of the potatoes (adjust liquid if necessary) season and put the lid on the pan. Steam for 2-4 mins as the fish turns white you’ll know it’s cooked!
Tickets include 4 x glasses of champagne – your first 2 glasses will be the Pol Roger Brut Reserve NV 750ml. Following on from this you will taste Pol Roger, Brut reserve, NV, 750ml, Magnum, (one of Lucy from the Old Garage’s personal favourites and not to be missed). The 4th and final champagne to try will be one of the first tastings in the UK of the Pol Roger, Blanc de Blanc 2013 vintage.
I’ve curated a Fish Bar Menu that you can order on the night as you wish or, if you’re in for a full feast, you can pre-order a Seafood Sharing Platter for two when you book your ticket with The Old Garage! This platter will include oysters, dressed crab, scallops, clams and more.
Its going to be the most fun we have had all year (no jokes) so bring yourself and your friends and wrap up because everything is going to be outside (there will be heaters and a covered area)
There are just 36 tickets for the evening, as social distancing measures are still in place, and there will be a maximum of six people sat at each table. If you’d like to sit with family or friends who are also booking, please state their names at the time of booking and the team at The Old Garage will sit you together.
MENU
Available to order as you desire, on the night (however, if you’d like to order the Seafood Platter please add a note when purchasing your ticket!)
Oysters
6 – £12 / 12 – £22
~0~
Smoked mack pate, pickled shallots, sourdough £6
~0~
Moroccan flat fish tagine, couscous & preserved lemon dressing £9
~0~
Monkfish kebab, chermoula, flatbread and tahini dressing £12
~0~
Seafood Platter for 2 £40
***Pre order this when you purchase your ticket!***
This Saturday we’re going to celebrate the return of the rule of six and the long weekend by firing up our wood-fired pizza ovens, to bring a slice of socially distant pizza to anybody within driving distance of Philleigh Way.
We’ll be asking you to book a time slot to collect your pizzas. As you drive in to Philleigh Way we’ll place your pizzas (and any wine orders) on a table that you can pull up alongside, so you don’t even need to get out of your car.
At the end of last year, we paid a visit to Porthilly Shellfish at Rock to learn more about their oysters and to enjoy some of their amazing produce straight from the half shell on the waters edge. Food doesn’t get much fresher than that. The quality of shellfish that we have access to in the UK, and particularly in Cornwall, is exceptional, and we want to celebrate it and encourage more people to eat Cornish shellfish, more often.
Oysters are nutritious and a great source of protein. These days they have a bit of a reputation for being an upmarket item only found on the menus of high-end restaurants, but historically they were a really common and affordable food, especially in Victorian-era London. Oysters are also great for the environment and native oysters are a keystone species; they fix carbon as calcium carbonate in their shells, and the reefs created by oyster beds can protect coasts from storm damage. Because oysters are filter feeders they improve water clarity, allowing sunlight to penetrate deeper so that sea grasses can flourish and provide valuable habitats for other marine life. This means that farming oysters is actually good for the body of water that they’re raised in.
Porthilly Shellfish raise oysters and mussels in the Camel Estuary on the coast of North Cornwall, directly opposite Padstow. The Marshall family has been farming at Porthilly for five generations, so although their shellfish operation is very well established it’s relatively new compared to the life of the farm. We spent a morning with farmer Tim Marshall and his nephew Matt, who runs the day-to-day operations of Porthilly Shellfish, talking to them about how they got started in oysters and how they create such an amazing product.
How Oysters Are Farmed At Porthilly
Like a lot of farming, it all starts with seed. Porthilly buy in oyster “seed” from a hatchery who nurture single oyster spats onto fragments of shell and grow them to about the size of a piece of granola (about 7mm x 7mm). The seed gets to Porthilly and is placed in mesh bags that are placed on racks in the intertidal area of the estuary. This is a classic French technique that lifts the oysters out of the sand and mud, and puts them in the best possible place to feast on all of the phytoplankton floating past them.
Porthilly also employ another method with floating racks suspended from a buoy line, that uses the motion of the water to tumble the shells. The oysters will spend up to two years out in the estuary, filtering around 200 litres of seawater per day through their partially opened shells. The team regularly turn over and shake the mesh bags to tumble the oysters around and promote the development of deeply cupped shells, and periodically the bags are brought back to the farm so that the oysters can be graded.
On the day that we visited, Matt and his team were grading oysters that were about one year old. The oysters are inspected on a conveyor belt, with any empty shells discarded, and then sorted by weight. As the oysters grow they are given more space in the mesh bags – as seed there might be a few hundred tiny oysters in a mesh bag, but as they get towards market size there are only around eight. This sorting is done using a machine that weighs, bags and counts the oysters. “This machine was designed for packing chicken or fish fillets in a food factory,” Tim told us, “but sometimes we’ve got a million and a half oysters to do and when we used bring them in on the back of the trailer and count them in, we’d lose count.”
Harvesting Oysters
Once they’ve reached market size, the bags are collected in and the oysters are unloaded into special saltwater tanks where they spend a few days. Water from the estuary is piped in and passed under ultra-violet lights before it reaches the storage tanks. This process kills any bacteria in the water and gives the oysters the opportunity to “freshen up” and drop any sediment that they may be carrying as excess baggage, without losing the beautiful flavor of their home waters. They’re then ready to be sent off to restaurants or fishmongers.
How Porthilly Shellfish Started
Tim began farming oysters in 1978. “The farm’s been in our family for five generations,” he told us, “And that means that we owned the land to the mean high water mark. My grandfather bought the foreshore from the then Duke of Cornwall, which is a bit of a grey area in terms of where the foreshore begins and ends. So we own and farm on a stretch on the Porthilly side of the estuary, as well as now having some racks on the other side of the estuary.”
“I used to mess about fishing and picking crabs and going out in the boats. I always thought I was going to have a trout farm of some sort, and make something out in the estuary. But it doesn’t really lend itself to that because it’s too shallow. And then when I was about 15 or 16 an academic came along from what was then Plymouth Polytechnic, who’d seen this system out in France. He asked if he could have a go at it here. He came and spoke to my Dad, who let him do it without charging him any rent. It failed for some reason and he gave up. There was a lovely old chap up the road who was one of my Dad’s contemporaries – a boatbuilder and carpenter by trade and a real character – a salmon poacher too. He was taking some of these oysters and selling them to a fellow in Exeter, and he told me I ought to get into it. He sent me to see his friend, who was using the French system in Exmouth, by Dawlish, so I went up to learn from him. He was really good to me and set me on my way.”
“Slowly, along with Rick [Stein] and other local chefs pushing shellfish, we slowly grew it. There were times when we struggled to sell them, but I took a trip to France and soon realised what a market there was over there, so that’s where we used to sell most of our oysters to. One year they didn’t want to take any, and it coincided with my son coming home and he wanted to grow mussels as well. We had to put the tanks in to make enough money out of the mussels, and it all just slowly grew on from there. That year that the French didn’t want any, we pushed it much harder in this country and grew the market. I don’t think we realised what a great product we had, compared to some oysters from other parts of the country.
Porthilly’s Pacific (Rock) Oysters
There are several different types of oysters that you’ll most commonly find in fishmongers or on a restaurant menu. Each has its own characteristics and flavour profiles, which are then developed further by the environment and conditions in which they grow; this is known in the oyster world as terroir, much like merroir in wine. Porthilly Shellfish raise Pacific oysters, a variety that originates from Japan but are now the most common variety farmed around the world. “The native oysters don’t like it in the bags,” Tim explained, “They also take five to six years to mature and get to market, whereas these Pacifics take half the time. They’re also more popular, as they’re cheaper and are a bit more accessible taste-wise. Native oysters are much more seasonal. We can harvest these Pacifics all year round, although they’re much better through the winter months.
The Oyster Lady really rates Porthilly’s Pacific Rock Oysters (and if anybody knows their oysters, she does), noting them to be “fresh, clean and creamy, with notes of cucumber and zinc.”
Brexit’s Impact On UK Shellfish Producers
Since our visit in December the Brexit deal has crippled the UK’s shellfish industry because of a law that indefinitely bans the export of live bivalve molluscs (oysters, mussels, and clams, for example), both wild and farmed, to the EU from non-member states. The only exception is if they have come from Class A waters or have been purified in depuration tanks (which shortens their shelf life, hence why most exports haven’t been purified). Much of the UK’s inshore coastal waters are categorised as Class B, so almost overnight a huge export market vanished. It’s a small and specialist market (valued at less than £12m/year) but for the people involved, it’s their livelihoods. Our friends at Porthilly shouldn’t be too badly impacted by this development because they have spent many years developing a great reputation and domestic market for their shellfish, and because they have depuration facilities on the farm. We’re glad that they seem to be an exception, but other fisheries (such as the traditional oyster fishery near us on the Fal river) aren’t so fortunate.
Food waste is an enormous problem – The World Food Programme estimate that globally, a third of the food that we produce is wasted. Here in the UK, that’s been estimated to work out to about £19 billion worth of food annually (by waste charity WRAP) and that unintentionally costs UK households hundreds of pounds every year. If you knew you were putting money in the bin every week, you’d start to do something about it, right? Food waste also has a huge impact on the environment, all the way along the supply chain and after its been disposed of: if food waste were a country it would have the third largest carbon footprint, behind the USA and China, and be a worse offender than commercial aviation.
This week is Food Waste Action Week (March 1st – 7th), a campaign led by WRAP’s Love Food Hate Waste project whose slogan is “wasting food feeds climate change”. Their aim is to raise awareness and help people to tackle the issue in their own homes. In our opinion, every week should be food waste action week, and whilst we can’t do much as individuals about the wastage that occurs between the field and our fridges, there are a few small adjustments that we can all make that will not only save us money but also do some good for the environment.
Three Ways To Reduce Food Waste At Home
Planning your meals and buying only what you need is a really easy way to reduce the amount of food that ends up in your bin, and also allows you to check use-by dates as you shop so that you don’t waste any food because it’s gone off. We’ve shared three one-week menu/meal plans over the last year – see our latest here).
Use up your leftovers – we throw away a lot of perfectly good food, such as stalks, leaves, the end slices of bread, and so on, that can be used in some amazing recipes (see below). The same goes for leftovers from meals, such as roast potatoes, that can be used in other dishes.
Check the temperature of your fridge. It should be below 5 degrees Celsius, but a surprising number of fridges aren’t kept that cold. You can add around three days onto the life of perishables such as milk and soft fruits if you keep your fridge at the right temperature (and don’t keep the door open for a long time when putting things in and out of it).
The Usual Suspects, And Waste-Not Recipes
The three things that UK households throw away the most of are potatoes, bread and apples. Just under half of all potatoes thrown away in the UK are untouched and edible – it’s criminal! Over the last couple of years we’ve shared a fair few recipes that make the most of leftovers and offcuts, so next time you’re about to drop something into the bin check back to here and click through to find out how to give it a second, delicious, lease of life:
This zero waste remoulade is a take on the classic French winter salad (also really popular as a side in the southern states of the USA) that makes the most of the broccoli stalk from last night’s dinner that you were about to throw in the compost bin… until now. There’s no waste allowed, here!
This version works amazingly with shellfish, cured meats or pate so I’ve paired it here with pan fried scallops. It’s quick, seasonal and tasty: You know the drill:
INGREDIENTS
3 scallops (per person)
2 apples (any variety)
1 broccoli stalk
Dill
1 lemon
Crème fraîche
Dijon mustard
White wine vinegar
METHOD
Begin by finely slicing and julienne cutting the apple/broccoli. Place into a bowl, then add the mustard, crème fraîche, chopped dill and lemon zest. Combine well.
Add a touch of vinegar and lemon juice to taste.
Heat a frying pan with a touch of oil, when super hot add the scallops. Cook for 2 minutes, before adding butter and turning over. Cook for a further 1 minute.
Season and taste the remoulade before serving with some crusty bread.
I absolutely love cabbages. These brilliant brassicas are available all year round because there’s always a variety in season, however February is when the classic spring green and savoy varieties are at their best. Here’s a little mix up to add to your repertoire in readiness for spring and summer.
INGREDIENTS
1 Sweetheart/hispi cabbage, halved
1 lemon
15 g Parmesan cheese
2 anchovy fillets in oil
4 heaped tablespoons natural yoghurt
½ teaspoon English mustard
1 teaspoon Worcestershire sauce
Red wine vinegar
Extra virgin olive oil
1 small red onion
Olive oil
METHOD
Fire up the BBQ or heat a large frying pan (and open the windows!) Char and burn the outer leaves of the cabbage.
Grate the lemon zest and Parmesan into a large bowl. Slice and add the anchovies, along with the yoghurt, mustard and Worcestershire sauce.
Squeeze in half the lemon juice, add 1 tablespoon of vinegar and 2 tablespoons of extra virgin olive oil and mix to make your dressing.
Finely slice the onions and add to the dressing…this will start pickling the onions.
Once the cabbage has cooled slightly roughly chop up, along with the romaine lettuce, and mix together with the dressing.
“For those that don’t have an extensive vinegar collection, I urge you to go and change that. Vinegar is the biggest thing and it will change the whole way you cook.”
Rupert Cooper, Owner and Head Chef/Tutor at Philleigh Way
Why Use Vinegar?
A well-stocked store cupboard makes it so much easier to create great midweek meals at the drop of a hat, and a small selection of vinegars should be central to it. It may be that you’ve collected a few bottles of different vinegars for specific recipes in the past, but now they’re at the back of the cupboard gathering dust. Don’t let that happen! Acidity is every chef’s secret, and that’s why so many recipes call for a dash of vinegar or a squeeze of lemon; acidity lifts a dish, cuts through the fat in rich recipes, and means that every mouthful of food sets off more of your taste buds. It’s not about making your food taste like vinegar (leave that to the malt vinegar that the fish and chip shop put on your chips…), and if used correctly and complimentary, it won’t. Our recent set of recipes for oyster mignonette sauces demonstrates the importance of an element of balanced acidity in making a delicious mouthful of food.
What is Vinegar?
Vinegar has been made and used all over the world for hundreds of years – in some cases dating back more than two thousand years. If people were fermenting natural sugars to make alcohol then in most cases they were also making vinegar, because vinegar is the result of the final product gone awry from being exposed to air. The word “vinegar” is derived from the French for “sour wine”, and that’s why most vinegars that you can buy correspond to an alcoholic drink.
If you’re sorting out your kitchen cupboards whilst staying safe at home, or can add a bottle of vinegar to each of your weekly shops over the next few weeks, then these are the five vinegars that I suggest you move to the front of the shelf, and why:
Red Wine Vinegar
A good red wine vinegar will fast become the go-to bottle in your store cupboard – it’s a great all-purpose vinegar. Use it in vinaigrettes, marinades and sauces, or add a slug to soups and stews, especially in French or Italian dishes, as I did in the recent Italian beans and steak recipe video that we shared (click here to watch it).
Apple Cider Vinegar
Apple cider vinegar, ideally an unpasteurized one which will appear cloudy and may have sediment, has become popular in recent years as claims that taking 1-2 tablespoons each day delivers a range of benefits to your health (plenty of them yet to be fully scientifically proven, I ought to add). It’s amazing for cooking with too, and is interchangeable with red wine vinegar in many applications. Use it in vinaigrettes or slaws in the summer when its lightly tart apple flavour adds a whole new dimension. This corner of the UK is well known for its ciders, so keep an eye out in farm shops next time you’re visiting and take a bottle of small batch cider vinegar back home with you.
Rice Vinegar
Sweeter and lighter than other vinegars, rice vinegar (derived from rice wine, or saki) is a must in so many Asian recipes. Sushi actually means “vinegared rice” in Japanese, such is its importance as a core ingredient. So many dishes from almost all Asian cuisines will call for a rice vinegar of some sort (different countries or regions often have their own variants) but a good Chinese rice vinegar, although slightly stronger than Japanese rice vinegars, should be a good all-round option.
Balsamic Vinegar
Balsamic vinegar isn’t technically a vinegar, because it’s not made from fermented alcohol but is instead produced by fermenting grape juice in oak barrels. The longer that it’s aged in oak barrels, the sweeter, thicker and more expensive it becomes. Balsamic vinegar is used in small quantities as a condiment, drizzled over a dish or a salad, perhaps even a dessert (have you ever tried it drizzled over strawberries?), reduced and drizzled over pizza, or paired with a great olive oil for dipping.
White Wine Vinegar or Sherry Vinegar
White wine vinegars are lighter and don’t pack quite the same flavour as red wine vinegars. You’ll most likely reach for it when creating more delicate dressings or when you’re cooking with fish or shellfish.
THE OLD GARAGE WINE AND DELI, CHI TENNYSON NANSLEDAN
SATURDAY FEBRUARY 13TH
On Valentine’s weekend, Ben Ambridge (The Fox’s Revenge) and I will be back at Nansledan on the outskirts of Newquay cooking up a full take-away barbecue feast.
VALENTINE’S MENU
MEAT BOX
Pulled pork Smoked chicken thighs Smoked sausage
~0~
VEG BOX
Smoked cauliflower and tahini Grilled aubergine and red pepper Smashed sweet potato.
~0~
SIDES Mac ‘n’ cheese Caesar slaw Pitt beans Pickles
£15 PER PERSON Comes with a bit of everything!
Pre order by 7pm on Thursday 11th by e-mailing info@philleighway.co.uk with your order, your preferred collection time (we’ll do our best) and a contact telephone number. You’ll be given a time slot to collect in (to ensure social distancing is adhered to) and we ask you to please wear a mask and maintain a safe distance from us and others.
The Old Garage will be pairing some incredible wines to the menu too and will be open for collections on the night- for all your wine, beer, spirits and deli items – you can email or text your orders through to them via their website.
It is said that cheese and fish don’t go together, but I’d say there are a couple of exceptions: fish pie, and this recipe. This dish is a cross between a kedgeree and a classic rarebit. It’s simple, full of flavour, and amazing for brunch or a light lunch.
You will need:
2 fillets Smoked haddock (or other smoked fish)
25g Butter
200ml Milk
Cheese – lots! (I used parmesan and gruyère, but you could use a good cheddar)
1tbsp Crème fraîche
1tsp Mustard
1tsp Worcestershire sauce
1tbsp Flour
Lemon – zested and half juiced
Nutmeg – to grate
Chives to garnish
2 thick slices of Bread
You can find more of our recipe videos over on our YouTube channel.
The Festive season is also shellfish season, when oysters in particular are at their finest. The French know this, which is why it’s traditional to enjoy fruits de mer on Christmas Eve, and why if you ever visit a French supermarket in the days before Christmas you’ll see pallets full of shellfish on ice for sale. Here in Cornwall we’re spoilt for choice with some of the finest seafood and shellfish, so just before Christmas we paid a visit to Porthilly Shellfish at Rock on the Camel Estuary in North Cornwall. We’ll be featuring their story and amazing produce in our next “Meet The…” article, but with last postage dates fast approaching we thought it best to share some amazing mignonette recipes to inspire you to order in some oysters to celebrate Christmas in style.
First Up: How To Shuck An Oyster
Take your oyster knife (and taking care – it’s a good idea to hold the oyster in a folded tea towel or a thick glove) and insert it into the small hole at the back of the oyster hinge, where the lid meets the cup. Pacific oysters like the ones raised by Porthilly Shellfish tend to be teardrop shaped and this makes it easier as it’s the obviously pointy end.
Carefully push the blade of the knife in until you can twist it and use the leverage to “pop” the oyster open.
Run the sharp blade around the inside, holding it flush against the inside of the lid to sever the oyster from the shell, until you can remove the lid.
Then run the blade around the inside of the cup to sever the abductor muscle that holds the meat to the shell, taking care not to spill any of the liquor.
You’re good to go!
Oyster Mignonette Sauces
Clockwise from top left:
Classic Shallot And Red Wine Vinegar
½ Shallot
Red wine vinegar to taste
Contemporary
½ Orange – squeezed
Small amount of rocket
½ Shallot
French
1 Spring onion
Small handful chives
1 tsp Dijon mustard
½ Lemon
Asian
Chilli
Coriander
Wasbi
Rice vinegar
Adjust quantities to your preference
Hot
2 jalapenos
handful dill
1 tbsp capers
1/2 shallot
Red wine vinegar to taste
If you’d like to order in some of Cornwall’s finest shellfish for a seasonal Christmas treat, delivered fresh to your door, you can order online from Simply Oysters or Fish For Thought.
The Christmas and New Year Holidays are a period full of great food – with lots of eating up of leftovers in between and afterwards! Last year I shared some delicious and different ways to use up cooked leftovers; this year, I’m going to share a recipe to use up leftover veg that maybe didn’t even make it on to the dining table in the first place: Brussel sprouts. I love sprouts… I once ate 132 in one sitting (true story). If you do too and like a little spice, then try this recipe.
Brussel Sprouts and Christmas
Brussel sprouts are a type of cabbage (we eat the buds) and a Christmas staple, but they often divide opinion. If you’ve bought in a load of sprouts but don’t know that you’re going to cook them all on Christmas Day, then why not try making kimchi with whatever you have left?
What is Kimchi?
Kimchi is a traditional Korean side dish of salted and fermented vegetables dating back two thousand years. It’s most commonly made with one or a mix of cabbage, Korean radish, carrot and onion with a blend of seasoning. Before refrigeration, it was the main way of preserving vegetables in Korea, where large earthenware jars were buried in the ground to prevent the kimchi from getting too cold in the winter and too warm in the summer. While there are countless variations, it’s general a spicy and sour flavour, and is eaten as a condiment or side dish or added to stews.
Fermenting Food And Its Benefits
Some people shy away from the idea of eating fermented food, but lots of our everyday staples, such as bread, cheese, wine and tea are all made using fermentation. In kimchi, the good bacteria that are found on the outside of vegetables are encouraged to grow, and in doing so they break down the natural sugars into lactic acid (creating kimchi’s tangy sour flavour).
Good bacteria, known a ‘probiotics’, are good for our digestive health helping with the absorption of nutrients and contributing to the strength of our immune system.
Step One: Sterilising Your Jars
You only want GOOD bacteria to develop in your kimchi, so sterilize your jars first:
Wash your jars and lids in warm soapy water and leave to dry on a draining rack – don’t touch the insides! You can dry the lids with a clean, dry, tea towel.
Place the jars and lids in a prehreated oven at 180C/160C fan/gas 4 for fifteen minutes.
Remove, allow to cool, and use!
BRUSSEL SPROUT KIMCHI
INGREDIENTS
1kg brussels sprouts, sliced or 1/4s depends if you like it chunky
1 Daikon (oriental or winter radish), cut into strips or sliced
1 Chinese cabbage, sliced
2 heads garlic, cloves peeled
1/2 cup Korean chilli flakes
2 inches ginger, peeled sliced
3 tablespoons white miso
2 tbsp gochujang
1 tbsp rice vinegar
Fish sauce to taste
METHOD
Place the shredded sprouts, daikon and Chinese cabbage in a bowl with a good handful of fine salt and mix well – don’t worry about the quantity because you’ll rinse a lot of it off afterwards. Squeeze it with your hands until some juice forms, then top it up with enough water to cover it. Weight it down with something heavy-ish like a sturdy pan. Cover and leave overnight.
Blend the garlic, ginger, miso, gochuiang, vinegar, chilli and splash of fish sauce into a blender.
Rinse the veg then mix with the garlic paste and pack into the jar, pressing it down firmly with your fist. I cover my ferments with a zip lock bag filled with water because it moulds to the shape of the ingredients and jar nicely, making sure it’s all submerged – a small dish or ramekin would be a non-plastic alternative.
Leave 4 days then taste… Adjust heat and fish sauce. Then after 10 days you’re ready to rock…
Comforting Italian beans and sirloin steak, topped with a green salsa. I cooked this outside in the farm yard on the BBQ because it was such a beautiful autumn day, but it’s just as easy on the hob.
This Friday night we’ll be at Devoran Village Hall (TR3 6PW) with our food trailer from 5pm – 9pm, or until it’s all gone! Based on the last few weeks, I’d definitely advise pre-ordering to avoid disappointment (DM on Facebook or Instagram, or email philleighorders@gmail.com). Here’s what we’ll have on:
MENU
Korean braised beef, with roasted red peppers & soy beans
This weekend our food trailer will be back, the weather will be better (supposedly) and there’s a new menu of warming winter dishes to choose from. If you’ve ordered some of our “At Home” take-away meals then you can collect these from the food trailer at the same time!
I’m once again offering a menu of pre-cooked Philleigh classics for you to take away and heat up at home. Order via email (philleighorders@gmail.com) by midnight on a Wednesday and you can either collect from one of our pop-up locations over the following days, or I can offer delivery in select TR postcodes on orders over £30.
Locations Around Central Cornwall Through November
Our brand new horse box mobile food truck was completed just a couple of days before the beginning of lockdown. Find us at the following locations through November, where I’ll be offering a menu of mouth-watering comfort food to take-away:
As we all start another period of “stay at home” safety measures across the UK and with winter weather and dark evenings firmly set in, evening meals are going to become a focal point for many families. We’ve had plans in place for the possibility of a second lockdown that we’ll be sharing over the next week, but the first thing that I know I can do to help, in some small way, is to lean on my skills as a chef and share some more menu planning tips and another one week meal plan.
What follows is a suggested meal plan for a week of dinners (similar to the one that we shared in the spring). For our vegetarian, vegan, dairy and gluten-free followers or those with other dietary needs, I apologise that not all of these dishes will work for you however I hope that you can still perhaps adapt some of these meals to your requirements or take inspiration from the core concept of carrying over key ingredients or leftovers into other meals.
Please click each link to be taken through to the web page with ingredients and instructions.
October is peak mushroom here in the UK. Whether you have the knowledge to forage (which is important, especially for hunting wild fungi as there are plenty of poisonous ones that look almost identical to edible varieties) or you get your mushrooms from the shops like most people do, at this time of year you should be able to get hands on some amazing mushrooms. Thanks to their firm texture and rich, earthy flavour they make an amazing substitute for meat in a lot of dishes – a favourite of mine being this mushroom stroganoff.
If you’ve got a vegan in your household then it’s really easy to turn this vegetarian dish vegan by using a vegan sour cream instead of the classic crème fraîche, or even to divide it into two pans right at the end before adding the crème fraîche and serve up both vegetarian and vegan options.
Ingredients
500g mixed mushrooms (sliced) – white closed cup are fine, but choose chestnut, Portobello or flat for more flavour
1 onion (chopped)
2 cloves of garlic (chopped)
4 small pickled onions, thinly sliced
½ tbsp Dijon mustard
½ tsp paprika
¼ tsp smoked paprika
200ml vegetable stock
200 ml crème fraîche (or vegan sour cream if you want to turn this vegetarian dish vegan)
Lemon cut into wedges
Handful of fresh parsley
Method
Add a splash of oil to a heavy pan and gently fry off the onions over a medium heat for five minutes.
Add the garlic and pickled onions and fry for another couple of minutes until it’s all softened but not coloured, then remove from the pan to a plate and set aside.
Add another splash of oil to the pan, turn up the heat and fry the mushrooms until they are going golden brown.
Return the onion and garic to the pan, turn the heat down to medium, and stir in the paprika and mustard.
Pour in the stock, bring it up to a gentle simmer, and leave uncovered for five minutes or so.
Just before serving, reduce the heat and stir in the crème fraîche (or vegan sour cream), and some chopped parsley.
Serve with rice or potato rosti, sprinkled with more chopped parsley.
It’s not going to be a “normal” Christmas this year, and that means no work Christmas parties. Or does it? If you are a small business or a tight-knight team within a larger organisation and there are six of you or less, then why not mark Christmas and the end of a strange year with a course at Philleigh Way?
We can host your small-group socially distanced Christmas party in the cookery school or roll the canvas sides down on our outside cookery area, and run your session within government guidelines. We can light up the woodfired oven and do a short pizza course and dinner for you all, or if there’s a cuisine that you’d all like to learn more about then we can create a bespoke Christmas party course around that – sushi, pasta, woodfired cooking, vegan food, baking; you name it, we can do it.
Take your pick from the following dates, or get in touch if there’s another date that works better for you and your colleagues and we can make that happen.
Wednesday 3rd November
Thursday 4th November
Wednesday 25th November
Thursday 26th November
Wednesday 9th December
Thursday 10th December
Wednesday 16th December
Thursday 17th December
Drop us a line on 01872 580893 or e-mail info@philleighway.co.uk and let’s hammer out some details, so we can make sure that you get to spend a bit of time together as a team socialising and not just working or staring at zoom meetings.
It’s officially baking season. Baking and pâtisserie is a branch of cookery that often borders on science, demanding attention to detail and patience to perfect. Few people are as dedicated to the craft of patisserie as pastry chef and 2018 Bake Off: The Professionals finalist Darryl Collins. We’re fortunate to have Darryl regularly share his knowledge and skills as a guest tutor at Philleigh Way, leading our Patisserie Masterclass course. We sat down with him to find out more about pastry and pâtisserie ahead of his next course on October 31st.
My theory to this is that to be a good pâtisserie chef you need to have an artistic level of thinking with a scientific mind. You need to look at the ingredients at a molecular level and not just as something that you use to hold things together.
I honestly believe that anyone can become a decent pastry chef with the right training and guidance but I don’t believe that anyone can just become a great pastry chef by accident. I’ve been a pastry chef for over 20 years and have also worked with many chefs and pastry chefs over those years – some extremely talented chefs and others that seem to just be doing it for a job. With pastry, it has to be a career choice. It has to be something you absolutely love and live for; there is no in-between.
For hobbyist bakers, I think I’ve already proven that you can do fine patisserie at home as well as in a professional kitchen. Since lockdown I’ve been running Yumii Pâtisserie from home and I was still able to create cakes, éclairs and so on. It’s about persistence in what you’re doing and trying different techniques. Hobby-wise, you’re looking on Instagram and other places like that for inspiration and then putting recipes together and playing around with them until you achieve what you’re looking for and what you think is right.
My advice to home bakers looking to take it up a notch is to see if you can get into a professional kitchen. Not all kitchens will allow non-professionals to go in and check out that side of things, but some will. You can always approach a kitchen to see if you can get some experience. Or, courses! You can go up to Ruth Hinks’ in Scotland at Cocoa Black because they do lots of courses, there’s a place in Banbury at Callebaut Chocolate where they have a Chocolate Academy. I’m obviously teaching a patisserie masterclass at Philleigh Way if people want to come and hone their skills, and we normally do that three or four times a year. These things aren’t free, but they’re the best way that you can pick up professional skills as a home baker.
The key elements to pâtisserie, as with all food, are taste, flavour, texture and looks. These are a must as several senses are involved – we eat with our eyes too!
Taste and flavour are probably of paramount importance. I’ve eaten in quite a number of restaurants and hotels and I would say that perhaps 70% of the desserts I have eaten have been of a poor quality. This is simply because they have been a case of style over substance, and something looking great on a plate but then tasting of nothing but sugar. I work on the flavours first and trial them with many different people well before I start to think about what it will look like on the plate.
The importance of texture is for mouth-feel, not so much for looks. When it enters the mouth it obviously can’t be grainy, it’s got to be smooth and pleasant so that you don’t think “hmm, what is that in my mouth?” Everything has to blend together. Texture is so important, not so much for your hands but
How something is plated and presented is highly important, even though it is something that is so often overlooked. We eat with our eyes first, then we get the aroma, and finally the taste.
These are the only guides a pastry chef needs to understand to be successful and to have a good understanding of patisserie. Knowledge is the key to all. If you want to do this for a living then train hard, listen to others but most of all be true to your passion and yourself. Then over time you’ll be able to excite people with your flavours and impress with your talents and skill as a pastry chef. The same goes for home bakers who want to wow – patisserie is a craft that you need to spend time learning.
On the next Patisserie Masterclass that I’ll be teaching at Philleigh Way at the end of October, I think that because it’s Halloween we’ll be doing something along that theme. We’ll make some pumpkin macarons, and we’ll do some choux buns – probably again with some sort of Halloween theme! That way I can teach some high level skills, but we can have a bit of fun with it all at the same time.
Schools may be back, but with the darkening evenings and limits on gatherings still in place, and so many options for entertaining kids still off-limits, plenty of parents are still in need of activities to keep their little ones entertained.
Luckily, autumn is baking season (every season should be baking season really, but autumn particularly so thanks to bake off and our patisserie masterclass course), and getting your children involved in the kitchen is a lovely way to spend time together and start to develop some important life skills. This recipe for gingerbread people is an easy win because of the options for cutting out different shapes and decorating the biscuits after baking, even if that last stage can get a bit messy. But isn’t that half the fun? (It’s certainly more fun than the cleaning up!)
Ingredients
175g dark muscovado sugar
85g golden syrup
100g butter
400g plain flour
½ tsp bicarbonate of soda
1 tbsp ground ginger
1 tsp ground cinnamon
1 egg
Method
Place a saucepan over a medium heat and melt the butter, then add the syrup and sugar and stir until melted. Little people can help with this if you have a step for them to stand on, but supervise them the whole time. Bring to a gentle boil for a couple of minutes, then take off the heat and set aside to cool.
Get a large bowl and tip in all of the dry ingredients, then make a well in the middle. Beat the egg in a cup and pour into the well, followed by the cooled butter and syrup mixture. Stir with a wooden spoon, then once it has pulled together into a dough, knead it in the bowl. This can get difficult for younger children as the dough forms, so you may need to take over. You can add a bit more flour if the dough is too loose, but don’t worry about it being overly soft.
Cover the bowl with cling film or place the ball of dough in an old plastic bread bag or similar, and place in the fridge for about an hour.
Preheat your oven to 200C/180C fan/gas 6
Take the dough out of the fridge and leave it for ten minutes or so to warm up a bit so that it is soft enough to roll out.
Dust your work surface with flour and use a rolling pin to roll out the dough until 5-8mm thick – no thicker than a pencil. Use a cutter to cut out your gingerbread people (or any other shapes – Christmas trees if you’re doing this recipe later in the year, perhaps?), nesting the shapes close together to get as many biscuits out of your rolled dough as possible. Then bundle up the scraps and offcuts of dough, roll into a ball and roll out again so that you can cut out more biscuits. Repeat until you’ve used all of your dough.
Place your gingerbread people (or shapes) on baking trays lined with baking paper, being sure to leave some space between each biscuit so that they don’t merge together as they puff up in the oven. This recipe will easily make enough to fill two baking trays.
Bake in the oven for 10-12 minutes. If you have two trays in the oven then swap them around half way through.
Take the trays from the oven and set aside to cool, then transfer the biscuits to a wire rack to cool completely, especially if decorating.
If you have any icing sugar or ready-made cake decorating icing (the little squirty tubes) then you or your small person can decorate the gingerbread, and you can also use it to stick on small sweets or chocolates for eyes or buttons, then leave it to set.
*When Christmas comes around, you can use this recipe to create six flat panels of gingerbread (two rectangular wall panels, two gable ends and two roof panels) and stick them together icing as mortar to make a gingerbread house. Children can decorate the house, and you can make gingerbread people and trees that they can use to create a wintery scene.
You can’t go past garlic as a store cupboard essential; it’s a key ingredient in so many dishes from all over the world, particularly in Mediterranean and Asian cookery. There’s also something pretty special about having a big bunch of plaited garlic hanging in your kitchen within arm’s reach and watching it shrink over the course of the winter as you keep breaking cloves off to cook with.
If you spent lockdown gardening and cultivating a vegetable patch then you may well have harvested your garlic pretty recently. Once harvested you need to dry the garlic in a dry, well-ventilated spot (a greenhouse or shed ) resting in a single layer on a rack so air can circulate underneath with all the foliage left on. This should take two to four weeks. If you planted a softneck variety then once the leaves are dry, you can plait them and hang them up for all to admire.
How To Plait Garlic
You’ll need at least 12 bulbs of garlic with the stems and leaves intact.
Trim the hairy roots with secateurs or scissors.
If you have uneven sized bulbs then work from big to small.
Lay down two bulbs with the stalks crossing each other.
Place a third inbetween them, on top, with the stalk running straight down the middle. Make sure they are packed tight.
You can either secure these first three together with some kitchen string or jute gardening twine (wrapped around the stalks and knotted tightly) or you can take the lower-most stalk and wrap it around the others to bring it back to its starting position.
Place a new bulb of garlic over the lower-most bulb (on one side) and run the stalk down the centre (grouping it with the stem that’s already there).
Cross the lower-most stalk over the top of the two stalks in the middle, and move them over to the side that it came from to maintain the three distinct sets.
Add another bulb to the other side and run the stalk down the centre, then cross the remaining single stalk from one side over the top of the two in the middle.
Add a sixth bulb in the centre.
Cross the stalks from the lower-most side over the top.
Repeat this process of side one, side two, centre, until you have used all of your bulbs of garlic. You might want to stop at 12 though, or you’ll start to find it difficult to plait the thick bunches of stalks and keep it neat.
Once you have all your bulbs woven in, continue to plait the stalks by crossing the bottom bunch over the top into the centre, then crossing the bunch from the other side over the top to become the centre, over and over to create your plait.
When you have your plait at the desired length, you can fold the end of the plait over to form a hanging loop, and tie it off to secure it all in place with some string or jute twine.
Hang your bunch of garlic in a cool, dry and preferably quite dark place away from any damp. If you don’t have a suitable spot in your kitchen then a walk-in pantry or large pull-out pantry /larder cupboard would be ideal. Failing that, a dry shed is will do the job, although you’ll have to go further to grab your garlic and it isn’t so easy to show off your new plaiting skills and home-grown garlic.
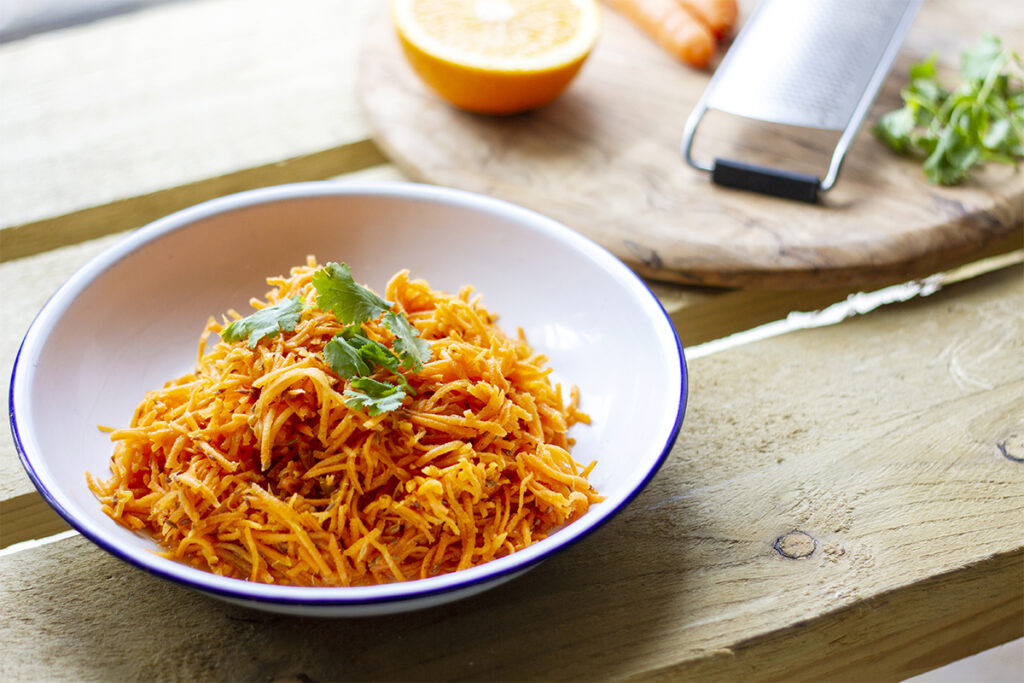
This tasty salad is really easy, can be prepared in advance (like, the day before) and works amazingly as an accompaniment to so many dishes, particularly at barbecues. This recipe makes a large quantity, perfect for a socially-distanced barbecue with family and friends, but you can easily halve the quantities to make less.
Ingredients
10 carrots, peeled and grated
2 oranges Zest and juice
3 tsp cumin seeds
100g Sunflower seeds (optional)
2 tbsp runny honey
2 tbsp white wine vinegar
6–8 tbsp sunflower oil
4 tbsp coriander leaves
4 tbsp mint leaves
Sea salt
Method
Peel and grate the carrots and zest and juice the oranges.
Mix the carrots and orange juice and zest in a bowl.
Toast the cumin seeds in a dry frying pan for a few minutes.
In a pestle and mortar, grind the cumin seeds with a pinch of sea salt, then stir into the carrot mixture.
In a jug or bowl, stir the white wine vinegar into the sunflower oil.
Tear the coriander and mint leaves into the dressing.
Pour it over the carrot salad and mix well, then serve or cover and store in the fridge.
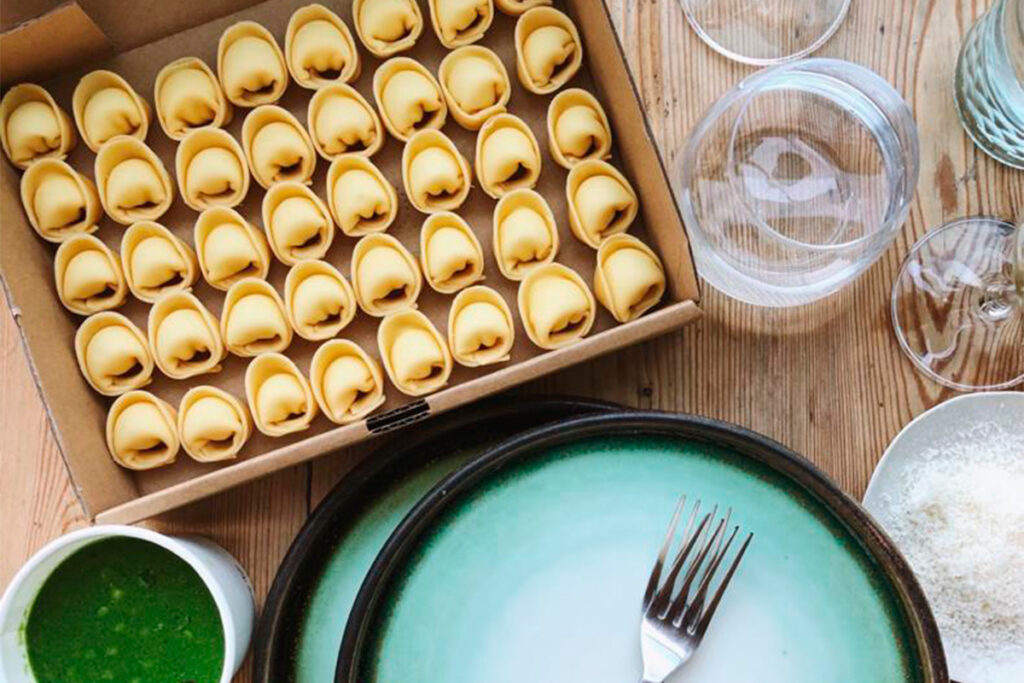
Adam Banks is one of Cornwall’s most well respected and talented young chefs, and we’re excited to be welcoming him back to Philleigh Way in early September for another of his “Italy with…” cookery courses. The former head chef at Jamie Oliver’s Fifteen at Watergate Bay, he has a deep passion for Italian food and his knowledge of the cuisine is second to none. During lockdown he started a weekend pasta box delivery that has proven so popular that it’s still going strong and selling out every week; I caught up with him over the phone whilst he was kneading pasta dough, to find out more about his food, his inspirations, and the best advice he’s received from any of the star chefs that he’s met and worked with over his career
Adam, what is it about Italian cuisine and the country’s food culture that draws you towards it?
It’s hard to say what I love about Italian food though… I feel it; it’s weird. I enjoy it and I always make this joke that I must have been Italian in a former life or something, because of this feeling for it that I have. I would have to say though that it’s the emphasis on the ingredients and how little is done to them to put them on the plate. Also the focus on seasonality – these are all things that I have always looked towards. I wish that the UK had some similarities to Italian food culture in the way that families get together for those meals, the matriarchs, those nonnas cooking and making pasta and dishes and passing the recipes down from generation to generation, teaching the family and making sure that the traditions are kept alive. I like the ideal of tradition in some ways, but I still like to move forward with ideas and techniques, or else you’re going to get stuck. The flavour combinations in Italian dishes, the style of food, the pasta… these are all quite simple ideas. A beautiful nice piece of fish, cooked quite simply, generally either in an oven or on a char grill, seasoned nicely, served with a simple salad or with some potatoes that somebody’s grown in their garden… cooking with beautiful vegetables. It’s only when you get to the restaurants that things start to change slightly, trying to impress you, but the little villages and the nonnas still getting up in the morning and smashing out some pasta is what draws me towards Italian food the most. It’s also the the rustic-ness of it, the idea that you can just put on a plate some vegetables, simply dressed, and not in a pretty fashion – toss ‘em all up, put them on a plate, and dig in as a starter or with a piece of meat.
You’ve visited Italy frequently, many times leading the Fifteen apprentices on a food field trip to Tuscany. What were your favourite things to share with the apprentices during those trips?
Those trips were really important, because we were basically trying to show the apprentices the importance of the ingredients and how much emphasis is put onto products and ingredients such as olive oil… to see it being made biodynamically, alongside these beautiful white cattle being reared on the same land and how it all interlinks. What we tried to build in those trips was a sense of respect. We tried to have fun with it and they were fun – we wanted them to enjoy it – but they were there for a reason. They were there to learn about Italian food culture, about why there is this big thing about Italian food. To have them in it and be there and be learning and eating and touching the grapes and the olives and to feel it, essentially, was probably one of the best ways to get it into them. To be there and to share with them what this all meant was one of my favourite things. To be able to say to them, “this is some of the best olive oil you’ll ever taste in your life and it’s because of this and this…” and give them the information, get them to meet the producer and try to fill the gaps for them. We’d have a producer or a grower talk to them about their wine or their olives or about their beef or about being a butcher, and we’d explain to them how important what these people do is and how important it is to respect your produce. Respect is a word that’s probably going to pop up a lot in this conversation, because I think that it’s sometimes lacking – especially in the food industry. We get these guys to grow things for us or go out and catch fish or rear cattle, and then we buy it off them and it’s almost like we lose that sense of what that person has just done for us. They put so much time and effort into that end product that we take off them that we should continue wholeheartedly with the respect for what they’ve done so that when it gets to somebody’s plate they can see that we’ve tried our best to give them the best representation of what it was that was grown, reared or caught. They were the favourite things to share with the apprentices on those trips, learning the respect and learning to admire what these people do constantly day in and day out.
What do you enjoy most about sharing your skills with others?
I would say the bottom line is that hopefully by sharing my skills with others we’re all going to eat better. I’m not saying that I’m some kind of preacher about what we should and shouldn’t be eating, but if I can teach somebody or show them something that helps them at home to eat better or cook better then surely that’s a good thing, and I enjoy that. I enjoy sharing my knowledge and I enjoy people asking me questions… although I probably waffle too much! At Fifteen it wasn’t just about food skills, it was also about social skills. You’re working in a kitchen, you’re working with people who have spent quite a number of years working in kitchens and building up respect and I suppose it was a way for us to pass on ideas of how to behave or work ethic, those kinds of skills – not just the best way to chop an onion or roll pasta. I think I quite enjoyed the idea of taking this group of people under my wing. Yeah I’d fall out with them on occasion, or they’d call me names and stuff like that or shout at me or stomp off, but it’s only because we were trying to get the best out of them and to show them that what they were doing originally or at that moment in time was not the correct way to do it. We’d try to, in a gentle way, guide them towards what we thought was the right way. Say one of the apprentices did something to another apprentice… there was no point shouting at them… we didn’t swear in the kitchen, it’s not a done thing any more. Kitchens are professional places now and people take it very seriously. We were trying to get the apprentices to be the best that they could be, regardless of their background. I think I enjoyed sharing a lot of my skills with everybody and it’s good to share. I think we’d all be in a better place if we shared more with each other, whether that’s how to cook or how to behave. I enjoyed seeing the apprentices take onboard what I’d told or shown them and putting it into practice.
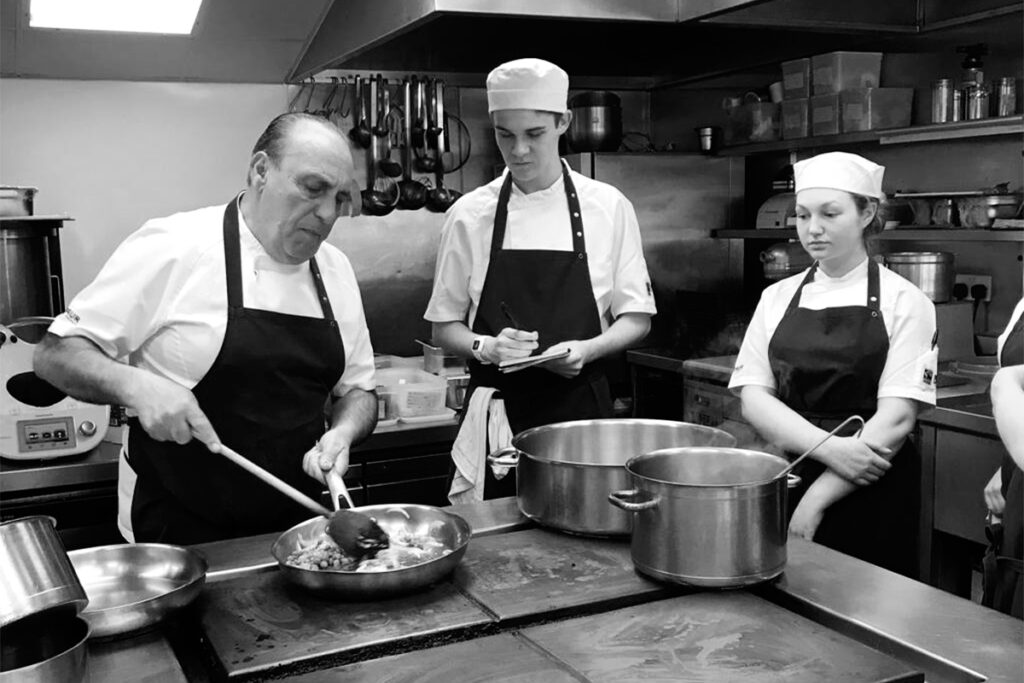
Legendary Italian chef Gennaro Contaldo teaching apprentices whilst visiting Fifteen.
During lockdown you started making and delivering a weekly pasta dish around your hometown of Newquay, and you’ve had a big pasta focus of late. What is it about pasta that you love and enjoy so much?
The versatility of it. The fact that’s it either just eggs and flour, or water and flour, and then you turn it into beautiful shapes or ribbons or little noodley things… there’re thousands of shapes and many of them I won’t ever see because it’ll be a little shape that’s only made in a remote little village right in the middle of Italy in some mountain range.
I’m kneading pasta right now as we talk! My focus on pasta hasn’t been intentional, it’s mainly because of the business idea of getting these pasta boxes to people during lockdown. It was a nice treat, it was a nice thing for me to be doing. I enjoy making pasta at home so my girlfriend asked why I didn’t just start making it for other people. I thought I’d start off doing ten portions a night and see what happened. It’s grown though, and it’s great. I max out now at about 30 portions per night which is plenty, so 60 over a Friday and Saturday, and I’ve been really enjoying it and people have been enjoying eating it.
I love the idea that pasta changes. It’s a bit like making bread; if you’re making it somewhere that’s quite dry or it’s a hot day or it’s humid, then the dough’s going to behave differently and react to what you’re doing and the touch and heat of your hands. It’s like you’re forever learning with it that I think is great. Some of it is understanding why you put egg yolks in with whole eggs one time and why you just do egg yolk another, why you do flour and water, why you do semolina and water, and working out those doughs. I just really enjoy it. Not only is it a quick and easy meal to eat at home but you can be creative at home and learn. Eating a good sheet of pasta with some olive oil, chili and salt is delicious, rolled well by paying attention on how many times you’ve rolled it and building up that structure within the dough, and then also paying attention to how thick you cut it and how you cook it. There are so many little variables but it’s just four and egg! It’s great and I love it.
What’s the best tip you’ve ever been given as a chef (and by whom)?
I’ve had a few over the years. Work hard, which doesn’t mean work all the extra hours, it just means when you’re at work, work hard. Get there 20 minutes or half an hour early, be in the kitchen 20 minutes before you’re supposed to start… but stay late if you have to. You’re a team, part of a brigade, you’re supposed to be a unit essentially. Work hard but make sure that you enjoy it. Keep your integrity, keep your ideas, keep your morals about what it is that you cook and what it is that you want to cook.
One of the funniest tips I was given was quite recently. I was having dinner with two guys who I was working for, in Paris, just before lockdown. We’d gone out for dinner at quite a fancy restaurant (three-Michelin starred L’Arpège) and the chef came out at the end to talk to all of the guests. He’s quite a famous chef called Alain Passard and he doesn’t speak much English, and none of us speak much French. One lad talked about how his grandfather was a fan of Alain, and had taught him about cooking and what it means. Just as Alain walked away from our table, he put his arm around me and leaned over the table and, in this really Parisian accent (you couldn’t get much more stereotypical) he said “Goodnight guys, it is all about the vegetable” and walked off. The three of us looked at each other with the realization that he’d not understood a word that we’d said to him! But, it’s stuck with me and when you think about it, it is all about the vegetables. We obviously eat too much fish, we eat too much meat, and we don’t give the vegetables enough of the spotlight. We leave them for the vegetarians and the vegans and that’s wrong man, that’s completely wrong. My girlfriend is pescatarian and during lockdown we found ourselves eating more and more vegetarian dishes, more because that’s how we like eating than anything else.
And what tip would you give to enthusiastic home cooks, and also to anybody wanting a career as a chef?
Enthusiastic home cooks… to those guys I would say read cookbooks, get ideas, and have a go. There’s no harm in it. One big thing is don’t cook things on ten – turn your hobs down and use medium heat, don’t blast things all the time because you will just burn stuff. But it’s more really about just having a go. Cook some food, enjoy it and enjoy the process of it. Enjoy cracking the eggs, mixing the flour, turning it into pasta, and enjoy the process as much or more than the end result of cooking the dish. Embrace the process at home. In a professional kitchen it’s all about the mise en place which is preparation, preparation, preparation, and that’s the bit that you need to enjoy. You’ll enjoy the cooking because that’s the high intensity adrenaline rush moment (especially in service), but if you’re cooking at home then you need to enjoy the prep. Man, I love rolling pasta and having a glass of wine, relaxing and enjoying the whole moment of it! Definitely always cook like you’re enjoying it because people will taste it in your food because you’ve put the effort and your heart and soul into it. And if you’re cooking for yourself do the same!
For people wanting a career as a chef… at the moment there’s hardly any chefs. People are crying out for chefs but young people don’t want to do it because they see it as this career where everybody works really long hours and you don’t get to hang out with your mates in the evenings, and it seems like really hard work. It can be all of those things and you’ve got to be dedicated if you want to succeed. I would say don’t be put off by that hard work because if you put in that effort you’ll get rewarded.
At Falmouth’s leading gastro pub The Star and Garter you did a lot of smoking and cooking over live fire, and at Fifteen at Watergate where you were head chef the focus was on Italian dishes. What are the key principles or threads that weave through all of your cooking?
I think it’s commitment, integrity, passion… they all sound like quite cheesy lines but I suppose that’s what it is. I’ve worked at Fifteen as a head chef but previously as a chef de partis and worked my way up to a junior sous chef position, and I’ve always enjoyed cooking Italian food. Then I went to Australia and was cooking Greek food, and then at The Star and Garter I was cooking a mixture of Italian and British influenced food. I suppose in the end you just want to make a plate of food that tastes good and looks appealing. I think when people say, “it might look a bit shit but it tastes great”, well it depends what you’re going for. It can’t always look shit because at some point people are going to say, “well, it doesn’t look very appealing to eat”.
I think keeping to my beliefs, so no matter what I’m cooking I make sure that I’m cooking nice food using good produce, good suppliers, and keeping my integrity and ethics the same constantly. I think that’s what shows when I put a plate of food in front of someone – it might not be classic Italian or classic Greek or whatever it is, but you can see what my passions are and my background. No matter what I’m doing though, I just enjoy cooking.
You’ve recently spent some time in Copenhagen. What are your thoughts on the food scene there and how has it inspired you in your cooking since returning?
I’ve been going out to Copenhagen for the last four years or so. I’ve got some friends who live out there so just going out to see them, but partly too because there are a few restaurants that I follow and I feel like I’ve been getting inspired by that scene for a while now. The ideas that they’re plating, their forward thinking on food, their creativity, I quite enjoy all of that. I think that if there was an opportunity then maybe I’d go out there to work for a while. But spending that last five weeks out there was great; I learnt so much in just five weeks which if I spent a year there it would drive a massive improvement in my capabilities as a chef and my technical skills. I’d learn so much. It has definitely inspired me, in the way that I plate things, in the way that I like to think about different ideas, particularly with fermentation and pickling, and how you can increase flavour profiles by adding fermented foods to dishes.
Emma, how did you find your way into becoming a full time forager and an author and authority on wild edibles?
I got into foraging at a really young age. We used to move quite a bit when I was growing up and when I was about 11 we moved from Singapore to Chester. With all the moves I would quite often start school a term late and I remember just reading a lot at the time. I found a book called A Book of Potpourri by Gail Duff and it described how plants could be used for so many different things. It was more medicinal, but that just really fascinated me. When I was about 14 I came across Roger Phillips book Wild Food and that was it; that was where it began. I would take myself out with my rucksack, my imitation Swiss Army penknife and the Wild Food book and I would have a look and see what I could spot. My dad would take me out picking elderflowers and blackberries and so on, and it was nice family time. I genuinely couldn’t believe how much plant life there was around me, and how much edible stuff too. How I got to where I am now was probably down to my “seize the moment” mentality – I think life is short and you’ve got to make the most of it, and I decided that something that I wanted to do was write a book. I thought, “Well, the one thing that I do know about is wild food” so that is where I started. I planned out an edible for every single day of the year, and because there is so much information it then got split into the four seasons. During the whole process I was learning at the same time. I loved the process. Also, because I have worked at Eden and Heligan for over twenty years now I got quite well known that way and managed to build a name for myself.
Why do you think that reconnecting with the food that grows all around us is such an important skill for people to relearn?
I think reconnecting with the food that grows all around us is such an important skill. It connects us to the land and it makes us aware of what is around us, and therefore it makes us care for what’s around us and the environment. I couldn’t really imagine living anywhere else now. I travelled about a lot growing up and loved it, loved all the plant life that I saw, loved the different cultures, but now because I moved so much I actually feel like the plant life is like family that I feel a connection to and I don’t think I could move away from it to somewhere with different plant life and plant niches, which sounds kind of funny. I never really had an anchor and Cornwall has become that anchor, especially when you build a connection with plants. When I do foraging walks I quite often get young couples, old couples and individuals, families and so on, and this really brings people together. I’ve had parents message me afterwards and say “you won’t believe it, my children never touch anything green and would never eat salad, but since they’ve been on a walk with you they’re actually eating healthily and are pointing at things in the hedgerows and have remembered so much of what you said” and I love that so much. Hopefully it’s broadening people’s food palates, it’s helping people to reconnect to the environment around them and therefore becoming stewards almost, to protect the land.
What’s the thing, fact or plant that most surprises people when you take them foraging?
It’s actually one of the most easily identifiable plants that I expect every forager shows their group, and that’s sorrel. Some people have had it before, but watching people’s faces who’ve never tried it, from a fairly small leaf, the intensity of this sour green apple flavour really blows people’s minds. I think that a second one would be pineapple weed, because a lot of people have said “oh my God, we used to play in fields and we could smell this pineapple smell and it reminds me of my childhood but I never knew what it was” and when they get to try the plants and taste that the flavour is as strong as the fragrance, that’s a fantastic thing. I love watching people’s faces light up at these incredible flavours. Maybe a third one would be pepper dulse, a seaweed which is one of the tiniest seaweeds but the flavour is crazy, it’s like a buttery garlic fish pepper punch. It’s incredible. It gets called the truffle of the sea and you don’t need much when you’re cooking with it.
You’re a cook and chef as well as a forager. What’re your favourite wild ingredients, and how do you like to use them?
My favourite wild ingredients… this is a really hard one because I’ve got way too many! But, I’ve tried to narrow it down to sea buckthorn, ramsons, elderflower, ramanas rose and black mustard. Sea buckthorn is out at this time of year (August time). It’s intense, really sour orange berries that grow in estuarine or coastal conditions. It’s like those intense sour sweets you might have eaten when you were younger. The vitamin C content is so high. Because it is such a sharp flavour it actually goes well with buttery things, so something like a sea buckthorn curd or as a cheesecake is definitely one of my favourites.
Ramsons, otherwise known as wild garlic… I can never wait for the ramsons to start popping up in the springtime. Ramson pesto is definitely a favourite and so, so simple too. Toasted seeds, maybe toasted flaked almonds works really well, olive oil, seasoning and then some washed ramson leaves blitzed up together makes such an amazing pesto which goes well with loads of things. Ramson garlic bread as well…. Anything garlicky, stick ramsons in!
Elderflower, there’s all the obvious ones but I think my favourite probably is elderflower cordial and something that I like to do with it is freeze it and then bring it out around Christmas time so you can do elderflower champagne. I love that. With cordials you can make elderflower delight, elderflower tarts… you can use it with so many things.
Ramanas rose is the coastal intense pink rose that’s flowering and fruiting now, so it’s got massive rosehips. They’re so juicy. A lot of rosehips are quite hard and have a lot of seeds in, and yes these have seeds in too and as with all roses you need to take the seeds out because they have tiny hairs that can irritate. But again, right now at this time of year the rose petals can be used to make preserves, jams, jellies and so on and it keeps that incredible rose flavour, and the rosehips are a great source of vitamin C, simply done as a syrup and served with Greek yoghurt and pistachios.
The last one is black mustard. I love black mustard so much. It’s kind of like a sweet wasabi, and the intensity of flavour is exactly the same, so it reaches a peak and then it stops. It’s incredible. If you’re making sushi then add on a piece of black mustard leaf or flowers right at the end, and it keeps the intense heat. Or you can wilt it and use it like a spring greens – it tastes a little bit like purple sprouting once you’ve steamed it, or even black mustard crisps work well. In an oven (keep an eye on them) and just a little rub of sunflower oil and sea salt and you can make amazing crisps.
You’ve written books covering foraging throughout the seasons. What’s your favourite season for foraging, and why?
That’s a really difficult question! I do love autumn, especially now from August into September because you get so many fruits, nuts and berries. You have coastal stuff all the time, so I love wintertime because of going down estuaries and you have all the evergreens but also shellfish and seaweeds through the winter – it’s one of the best times really to collect seaweeds. But then I also love springtime because you have ramsons and incredible spring flowers including things like magnolias, flowering current and lilac. All of them, the flavours are just incredible. Magnolia tastes quite ginger-y and works really well as a spice. Flowering currant has quite a blackcurrant leaf flavour and is quite perfumed as well. Lilac is quite indescribable – very floral and works nicely in cakes. It’s like asking to choose a favourite child or pet! I like all of them.
And with such a range of environments here in Cornwall, and particularly around us here at Philleigh Way, what’s your favourite environment to search for food in?
My favourite environment has to be estuaries. There’s always a plethora of edibles such as plums, sea purslane, cockles, oysters, sea beet, sea arrowgrass and marsh samphire. Where two different niches come together you quite often get a lot of edibles in one space. When people say “could you do a woodland forage”, yes I could but it can’t be dense woodland because you don’t actually get that much stuff in a woodland. If it’s a mixed woodland, so you have deciduous and evergreens, and there’s a lot of dappled shade and there’s paths, hedgerows and so on, then you get a lot more stuff, so an estuary where the land and the river or sea meet together you get an intense pop of edibles. I love estuaries so much and I find they’re quite often fairly quiet places, so getting away from beaches, cities obviously at this time of year, walking down beside a calm body of water and picking and eating as you go, you can’t really get better than that.
What will you be looking for whilst leading the foraging course here on August 22nd, and what will you be teaching attendees to make?
On the course I will be looking for some of the usual suspects like blackberries and hazelnuts, but also hoping to find wood avens for the clove-like flavoured roots, honeysuckle should still be flowering, elderberries, maybe some mustards, pineapple weed. Where we’re heading, we’ll be going down a lovely country lane so great hedgerows there, across a field so there may be some nice wild edibles in that, through or near a woodland and then down towards the estuary where I’m really hoping to find some estuarine edibles. I’ll do a forage before the event and Rupert and I will pre-prepare the food; we’re thinking along the lines of things like hazelnut praline at the moment!
For anybody who can’t join this course to learn the secrets of foraging with you, what would be your one top tip, plant or recipe to help them get out there and discover the world of wild edibles?
For anyone who can’t join me then if you’re going out foraging by yourself my top tip would be to start slowly, go with the most easily recognisable plants – things like blackberries and nettles. It doesn’t matter if you know about blackberries and nettles already, it’s a really good place to start experimenting with flavours.
The more confident you become with things you know are edible, the more you can go on to branch out and try new flavours and new edibles. Go through the seasons, and start slowly. When you’re picking plants check the quality of the plant and make sure it’s not yellow or wilting, and doesn’t look diseased because think of it as any other food. If you see anything like this the plant could potentially have been sprayed and you don’t want to eat that, so think about quality. Use really good ID books on foraging with really good pictures and read the descriptions of the plants and also read about the look-a-likes too because it’s really important to know what to avoid as well as what to look for. Something to try if you haven’t done it recently, or with foraging in mind, is to walk down a country lane near where you live, or even if you live in a town walk through the town because there’s some great edibles about. Go in mind of what is out there, and what is available at this time of year. Keep doing it and you’ll recognise more and your confidence will grow. Probably the simplest or loveliest recipes definitely, one of my all time favourites, has to be nettle soup and a really good tip with this is to season it well, use crème fraiche if you can (or some sort of creamy product), and also blitz it too because you don’t want a stringy soup. And you can’t beat blackberry jam or a blackberry and apple crumble! There’s something crazy like 300 different sub-species of blackberries here in the UK, so you will get a whole assortment from big fat juicy ones to sour ones, slightly salty ones, tiny ones, just use them all and a good squeeze of lemon juice always brings the flavour out.
Smoking has been used as a means of preserving and flavouring food, particularly meat and fish, for thousands of years. These days, few people smoke their own ingredients at home and instead buy ready smoked products (mackerel, salmon, and bacon are the most common), however the process is incredibly easy and accessible.
We’re going to share a few different smoking techniques with you over the course of a small series of articles, ranging from the simplest DIY hot-smoking techniques, through to larger scale cold-smoking which can be more involved or require some additional equipment. Hot smoking (which we’ll cover in this article) is a method of medium temperature cooking using smoke, whereas cold smoking is a drying process at a lower temperature that flavours the ingredients but doesn’t cook them. We cover some of these techniques in our Better Barbecuing course, or keep your eye out for specialist smoking courses and feasts with our friends from Pro-Q.
If you want to experiment with hot smoking fish fillets, garlic, cheese or other smaller items, then a home-made biscuit tin smoker is a great place to start. You can buy a special hot smoker, but the principle is exactly the same.
Biscuit Tin Smoker Materials and Ingredients
An old metal sweet, biscuit or cake tin, or a metal bread bin
A wire cooling rack or wire mesh
A pair of pliers
Hacksaw (optional)
A drill with a metal drill bit or a screwdriver/centre-punch and hammer
Piece of scrap wood
Wood chips (hardwood such as apple, cherry, beech, or oak – not softwood)
Salt flakes or coarse salt for curing
How To Make A Biscuit Tin Smoker
If your wire rack doesn’t fit inside the tin, then use a hacksaw to cut it down to slightly larger than the tin and then with your pliers bend the cut ends down to make legs. You rack should sit about 10cm or so off the bottom of the tin.
Take the lid of your tin and make a couple of holes in it. To do this, place the scrap wood underneath and then either drill two holes or punch them in with the screwdriver and hammer.
Place a layer of woodchips or shavings in the base of the tin, a centimeter or so deep, and then set your rack in place.
Hot Smoking Method
To prepare fish or meat for smoking, you need to cure it using salt, to draw out the moisture. Sprinkle a layer of salt flakes, or very coarse salt (fine salt is too aggressive and will leave an overly salty flavour) on a plate, then lay your fillet on top and sprinkle another layer over the top. You can create a curing mix with brown sugar, or citrus zest and spices added if you wish. Place it in the fridge and leave it. For a fillet of mackerel that is quite thin then five to ten minutes will do, but a thicker piece of meat might require an hour. You want a pellicle to form, which is a slightly sticky surface. Once cured, rinse the fillet quickly under cold running water to remove the salt and pat dry with kitchen paper.
Place your biscuit tin onto your barbecue or gas burner (be aware, if you are doing this inside over a gas hob your kitchen will get very smoky, and likely set off your smoke alarm so be sure to open all the windows and doors) and heat until the wood chips start to smoulder. Place your mackerel fillets, or whatever it is that you’re smoking, on the rack and place the lid on securely. Turn the heat down or move the tin slightly to a lower heat are of your barbecue, and leave it to do its thing! If you are hot smoking mackerel then check it after ten minutes – if the flesh is opaque and flakey, then it’s done! Thicker cuts of fish or meat will take longer, depending upon how thick it is.
Once you’ve made your biscuit tin smoker it will last you for ages. Every time you fire up your barbecue or fire pit, or take a bucket barbecue to the beach, you can take your hot smoker with you as well and smoke fish for yourself and your family or friends. If you’re a fisherman or angler then you can cook your catch right there and then, and enjoy freshly caught and smoked fish with thinly sliced and buttered brown bread, and a squeeze of lemon juice, or make mackerel pate by flaking the fish and mixing it with crème fraiche.
A Guide to Different Wood Chips For Smoking
Apple – Mild and fruity flavour – amazing if you can get hold of some!
Oak – a classic and heavier flavour, it is usually used for smoking meat or game but it goes really well with salmon, although you need to be careful not to overdo it.
Beech – a subtle smoke flavour – beech is a great all-round option
Alder – a classic option for smoked salmon, alder produces a delicate and slightly sweet flavour.
Mechouia salad (also known as slata mechouia in Tunisian Arabic) is a simple grilled vegetable salad that ticks every box for Mediterranean food. As with so many of these classic regional dishes, recipes vary from village to village and family to family. Mechouia has a base of char-grilled tomatoes, onions, peppers, chillis and garlic, which are coarsely chopped and seasoned before being dressed with olive oil. Traditionally the salad is often then topped with fresh herbs, olives, hard-boiled eggs or tuna. This is an amazing summer dish, and whilst it can be made in the kitchen it really comes into its own if you char grill your vegetables over the coals of your barbecue. It makes a great side (pictured below served with pork tenderloin that was offset grilled over the coals and then seasoned with smoked paprika and fennel from our Better Barbecuing course) or can be enjoyed as a stand-alone meal with crusty bread.
Ingredients
4 Medium Tomatoes
2 Red Peppers
2 Large Jalapeno Peppers
2 Small Onions, the outer paper leaves removed
1 Teaspoon Caraway Seeds
½ Teaspoon Coriander Seeds
2 Cloves Garlic, finely minced
¼ Cup Extra Virgin Olive Oil
1 Tablespoon red wine Vinegar
Salt and Pepper to Taste
Method
Using either a grill or BBQ fire, char the outsides of the tomato, peppers, and onions until they’re completely blackened and blistered, turning frequently to char all sides. You can put the onions directly into the coals of the fire. Place the vegetables in a large bowl and cover with plastic wrap to allow them to steam in their own heat for 15 minutes.
Peel the char off of the vegetables, coarsely chop them and place them in a bowl.
Toast the caraway and coriander seeds in a dry pan for a few minutes until they become fragrant. Grind them into a powder in a spice grinder or a mortar and pestle.
Add the spices with the olive oil and vinegar to the chopped vegetables and stir well. Salt and pepper to taste.
Asado is an incredible Argentinian all-day outdoor cooking experience that is a real feast for the senses, and we’re excited to be welcoming chef Tim Gibb of Asado Fire Kitchen to Philleigh Way on Sunday August 2nd for a special asado course. To get an idea of what attendees can expect from the day, and to find out more about the art of asado, we fired Tim a few questions.
For those who aren’t familiar with it, what is asado? Asado is not just the act of cooking over fire it’s the ambience created by the whole event. Its about the food, the party, the drinks and the good vibes. Similar to what we term BBQ, just taken up a few levels. Generally it’s a whole day and night event and nothing is rushed.
So there’s more to it than cooking a whole lamb over fire on a cross? The lamb on the cross is one of the most iconic asado images and it really does do the meat justice, but the whole day/event is a feast. Vegetables cooked over fire is a whole world of new flavours and things to play with.
Your Dad ran a smokery where you live in Dorset so you grew up surrounded by smokey flavours, but how did you then discover asado and develop your skills? Working with Dad from a young age led me into kitchens, with a particular passion for seafood. I also spent a lot of time around the Jurassic coast of Dorset fishing as a nipper, and we all know that you also spend a lot of time not catching fish! During these times fires were usually a go to and if/when the fish did turn up we were rolling. Cooking preparation back then was never our strong point – it usually centered around a fire, a dirty knife and a pokey stick thing trying to avoid the exploding pebbles, but it possessed a beautiful simplicity. One thing has led to another over the years skills wise, and having travelled, but I was consistently drawn back to cooking over and around fire. Then I just put the two together and started discovering where things could go. I don’t think you ever stop learning.
From where do you find your inspiration? Like any chef (I imagine) it comes from the excitement of eating and having a good time. We live in an incredible time where local produce is going from strength to strength and finding new ways of doing it the justice that it deserves is an exciting prospect. I don’t profess to adhering strictly to the South American rules of asado, its more that I’ve taken the style and the ethos and I’m giving it an English twist. Fire cooking is huge now so one of the joys of social media is seeing what others are up to and how they are doing it. Not only for new ingredients, but for cooking methods and techniques.
Where’s the most memorable place you’ve lit your fire? For me it has to be the beach – I’m a huge fan. Chesil Beach is incredible and even though it’s right on my doorstep it never grows old. Every venue provides new challenges, its one of the joys of outdoor cooking and because you’re always on the move it stays exciting. 2020 had some stunning venues lined up: the shore of Lake Windemere, a back drop of the historic ruins of Corfe Castle here in Dorset, Penn Castle over looking the Portland race towards Durdle Door to name a few, but unfortunately Covid-19 put a stop to all these for the time being. 2021 will be an awesome year.
What’s your favourite thing to cook over fire and why? Any surprises? I’m a huge fan of cooking seafood. It really takes the flavor of the fire so well and there is a heap of different ways to cook things that keeps it exhilarating. Dirty lobsters, planked fillets, grilling prawns, scallops in there shells, fire basket mussels, the list is endless. The fire looks so cool when it’s packed with a seafood feast and a lot of it is amazingly simple to do. Watermelon is one of the more unusual items to put around a fire I suppose you could say, although nothing is off limits anymore. The flesh absorbs a beautiful sweet smokey flavor, not too dissimilar to tuna – but it’s watermelon!! Reserve the sweet juice that you collect during cooking and you have a watermelon consommé. A bit of smoked feta, mint dressing and you have a vegetarian alternative that will stun the most hardened carnivores.
And your favourite bit of kit? Not so much an individual bit of kit but I’ve been converting a 1964 Bedford fire engine for a few years now and although we keep hitting road blocks, when I get everything that I have planned in my head on board she really will be a fire cooking mecca. It’s going to be an Argentine grill, hot smoker and wood fire kitchen all in one. It’s been a challenge, but during lockdown we have made positive progress with her and I’m optimistic that things are now moving in the right direction. Kit-wise it has to be the pit and frame from Tom at Country Fire Kitchen. Its incredibly well made and versatile so has endless possibilities.
What will attendees on your course learn, and what will they be able to repeat at home after the course? Attendees will learn a host of different cooking areas surrounding a fire and how to utilize the energy and flavor in all manner of ways. They will learn how to adapt equipment they may have at home to cook in ways they never thought possible. We will cook some things fast, some slow, some dirty and discuss the benefits of the best way to cook particular things and why. We will get the lamb on the cross, veggies in the embers and showcase how you can do smaller versions for smaller parties.
If you could give aspiring backyard asadors one piece of advice, what would it be? If you think something is possible and like the idea of it there is only one way to find out: Do it! The rules are consistently being re-written so don’t be put off by the fact you haven’t seen it done before. Also, get rid of your watch. It’s ready when it’s ready and until then enjoy the company, drink and conversation.